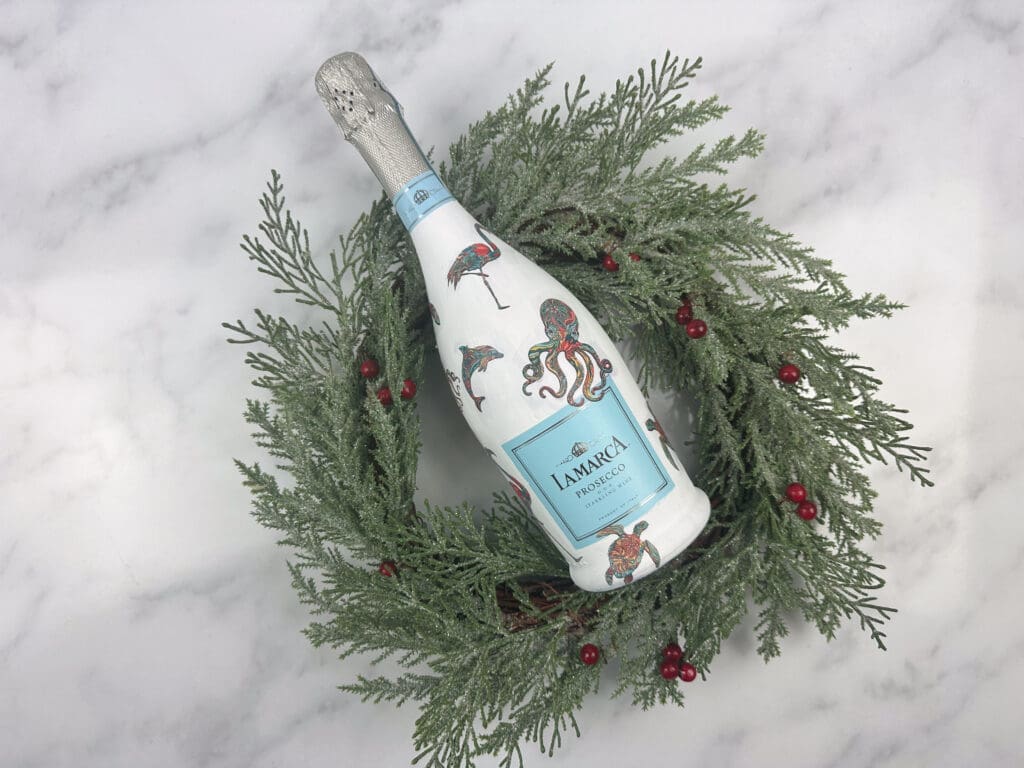
Are you ready for a fun and easy tutorial? This quick and adorable decoupage project will up your gifting (or hostessing!) games this season. Let’s make a custom wine bottle with our fun Saltsy Sea Christmas Creatures and a Cricut Maker!
This project is inspired by @lauren_holifield.
The Cricut Maker continues to blow us away with its cutting abilities. Admittedly, we weren’t sure we were going to be able to get the intricate designs of the Saltsy Sea Creatures to work on such a small scale, but there was certainly no way we were going to try it with scissors. So, we dove right into this without knowing what was going to happen! However, the print and cut feature on our Cricut Maker worked perfectly for this project! (If you don’t have a Cricut Maker we suggest choosing slightly less complex shapes or images that can easily be cut using scissors.)
Ok, let’s dive in!
Supplies for Your Custom Wine Bottle:
- Wine or Champagne bottle of choice (any will work, but we like the shape, heft, and celebratory nature of prosecco and champagne bottles!)
- Painter’s tape
- White acrylic paint & paintbrush
- Mod Podge
- Saltsy Sea Christmas Creatures Art Files
- Cricut Maker & color printer
- Cricut Essential Tool Set
Step 1: Prep the Bottle
Using your painter’s tape, carefully tape along the edges of the label to protect it from the paint. For our prosecco bottle, we also taped off the bottom edge of the foil capsule.
Once your tape is ready, grab your white paint and start painting! You will want to allow the paint to dry completely before applying another coat. We did about 4 coats of white paint to get the bottle covered to our liking. Once the paint is dry, carefully peel off the tape.
TIP: You can use a hairdryer on the cool setting to speed up the drying process.
Step 2: Print and Cut the Artwork
Once your bottle is dry, it’s time to prepare your art. Decide which shapes you want, then print them on a color printer on a piece of regular printer paper. (For this project, the thinner/more lightweight the paper, the better!) Then you’ll use the Cricut Maker’s print and cut feature to cut out the shapes. This will save you tons of time and get you the most accurate cut.
NOTE: Be sure to use the light grip mat for this project! If you choose a heavier grip mat, peeling the shapes off without tearing them will be very challenging!
Using your weeding tool, carefully pull away the excess paper and lift your designs off the mat.
Step 3: It’s Time to Decoupage Your Bottle!
Now that you have all your shapes it’s time to apply them to your custom wine bottle. We played with where we wanted our shapes to be placed so we had a general idea of the layout. When you’re ready, brush a thin layer of Mod Podge onto the area where you’d like to place your shape. Using your Cricut tweezers, place the paper shape onto the area of bottle you just Mod Podged. Apply Mod Podge in thin layers as needed until your shape is flattened and sticks. Continue until the bottle is fully decorated, then allow it to dry completely.
Voila! A Beautiful Custom Wine Bottle
We love how this turned out and we can’t wait to pop it open as a fun drink for New Year’s Eve! That is, if it hangs around that long… we can think of lots of teachers, friends, and family on our list who would appreciate a splash of holiday cheer in the form of a cute, custom wine bottle! And, really, isn’t spreading cheer and creativity the best way to spend the season? We think so. Cheers!
